Creating an Individual Personalization Page
Follow these steps to create a personalization page from scratch. After you create a page, place a link to it on your site. Then, any authenticated membership user can use the page to create his own personal portal.
Widget Spaces
A widget space declares which widgets a user or community group member can drop on a personalization page. You can create and modify these types of widget spaces:
Group space - widgets that can be applied to a community group. See Also: Creating a Community Group Personalization Page
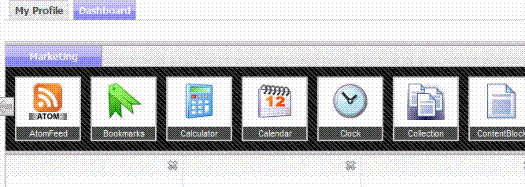
These widgets appear in the personalization screen’s widget tray (shown below) when a membership user is personalizing a page.
A third type of widget space, Workarea Dashboard, determines which widgets are available to users when customizing their Smart Desktop.
For example, NASCAR community group members are only allowed to drop weather and news feed widgets onto the group's personalization page. In this case, you would
1. Create a widget space.
2. Select only weather and news feed widgets.
3. Sign on to Visual Studio to create the .aspx page.
4. Drop a Personalization user control onto the page.
5. In the control’s widgetspaceID property, identify the widget space you created in Step 1.
Steps for Creating a Personalization Page
Prerequisite: To access this screen, you must be a member of the Administrators group or be assigned to the Personalization Admin role
1. Go to Ektron CMS400.NET Workarea > Settings > Configuration > Personalization > Widgets. See Also: Widget Reference
2. Click the Sync button ( ) make sure all widgets are available.
3. Go to Settings > Configuration > Personalization > Widget Space.
4. Click the Add button ( ).
).
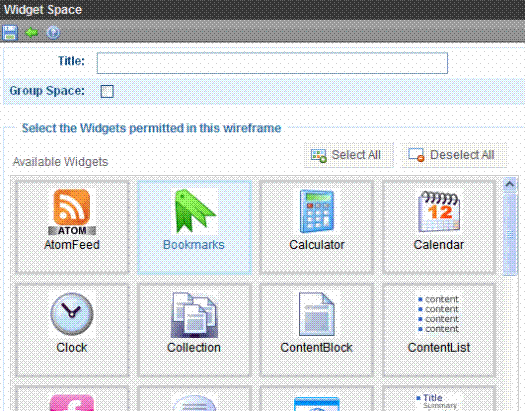
5. Enter a Title.
6. Check the Group Space radio button if this widget space will be used for a community group personalization page.
7. Select widgets that authorized users will be able to drop onto a page.
As you select a widget, its background color changes.
8. Click Save ( ).
).
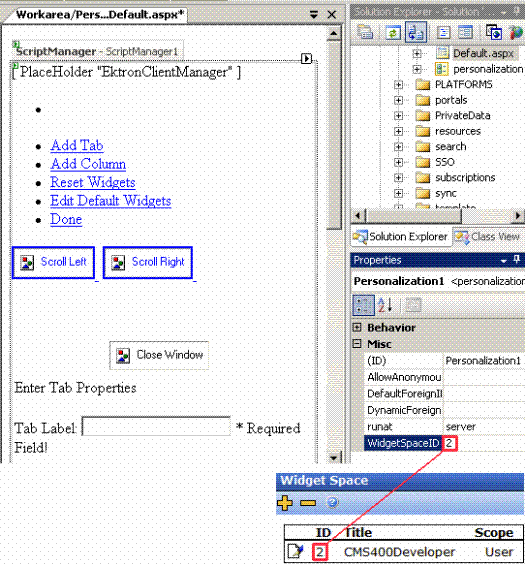
Note: Remember your widget space’s ID number. You need it when setting up the Personalization user control.
Note: The rest of this procedure explains how to create a personal portal for a membership user. To learn how to create a portal for a community group, see Creating a Community Group Personalization Page.
9. Open Visual Studio.
10. Create a new Web Form.
11. Switch to design view.
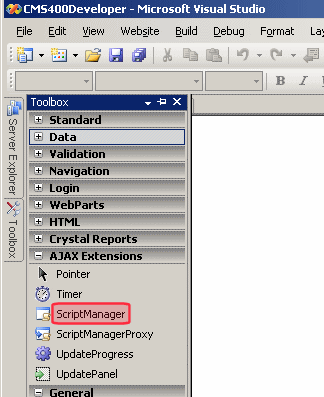
12. From the Toolbox, drag and drop an Ajax Extensions > Script Manager control.
If you do not see a Script Manager control, install the Microsoft AJAX Library 3.5. To do this, go to http://www.asp.net/ajax/downloads/.
13. In the Visual Studio folder browser, open the workarea/personalization/ folder.
14. Drag and drop a Personalization user control (personalization.ascx).
15. Set the control’s widgetspaceid property (circled below) to the ID number of the widget space you added in Step 6.
16. Save the Web Form.
Verify that the User is Authenticated
Your page should redirect the user to the personalization page, or use an ASP.NET panel to verify that user is authenticated.
Note: The asp.net panels are implemented in eIntranet and ektron Tech site.
Here is sample code.
Aspx.cs
// To check if user is logged in or not
Ektron.Cms.CommonApi IsUserLoggedIn = new Ektron.Cms.CommonApi();
if (IsUserLoggedIn.IsLoggedIn)
{
Response.Redirect(“dashboard.aspx”);
Or
pnlDashboard.Visible= true;
}
Else
{
pnlDashboard.Visible=false;
}
Aspx
<asp:Panel ID="pnlDashboard" runat="server" Visible="False">
<asp:ScriptManager ID="ScriptManager1" runat="server" EnablePartialRendering="true"></asp:ScriptManager>
<ucEktron:Personalization ID="widgetSpace" WidgetSpaceID="1" DynamicForeignIDParameter="id" runat="server" />
</asp:Panel>
The Synchronize Widgets Screen
Prerequisite: To access this screen, you must be a member of the Administrators group or be assigned to the Personalization Admin role
This screen helps you synchronize widgets in your Web site’s site root/widgets folder with those in your Ektron CMS400.NET Workarea. So, for example, you recently created two new widgets. To make them available within the Workarea, click this screen’s Synchronize button ( ).
).
After you click the button, you see new widgets on this screen and other Workarea screens that let you select widgets. Conversely, clicking this button removes any widgets that you delete from the site root/widgets folder.
This screen also lets you edit widgets by clicking the corresponding Edit button ( ). For most widgets, you can change only the title and label. However, you can change a few widgets' properties. For example, you can enter or update properties of the BrightCove video widget.
 See Screen Sample


