Creating a Taxonomy
This section explains how to create and deploy a taxonomy.
Planning the Taxonomy
It helps to design a taxonomy on paper before creating it in Ektron CMS400.NET. This can let you determine relationships among the kinds of information before you try to implement the taxonomy.
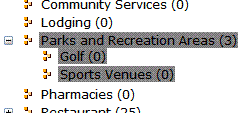
As an example, here is a hierarchy of some content in the Ektron CMS400.NET sample site. The top level item is the taxonomy. All levels below it are categories.
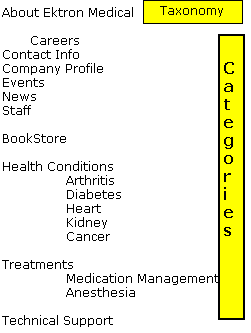
Next, review the site content and decide which content items and folders to assign to which taxonomy categories. Some categories may map directly to a folders. Other categories may use content from several folders.
Once you determine how content and folders will be assigned to taxonomy categories, sign on to Ektron CMS400.NET and set up those relationships.
Creating a Taxonomy
Note: Only administrators or users to whom the Taxonomy-Administrator role has been assigned see the Content > Taxonomy option. See Also: Defining Roles
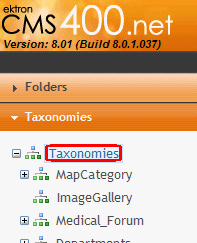
1. From the Workarea, go to Content > Taxonomies > Taxonomies.
2. Use the View > Language selector pull-down to choose a language for the taxonomy (see below).
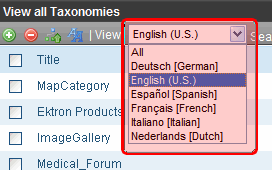
See Also: Creating a Taxonomy in a Multi-Language Environment
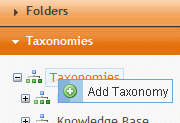
3. Click Add Taxonomy ( ).
).
Alternatively, you can hover the cursor over Taxonomies in the right panel, right click the mouse, and click Add Taxonomy.
4. The Add Taxonomy screen appears.
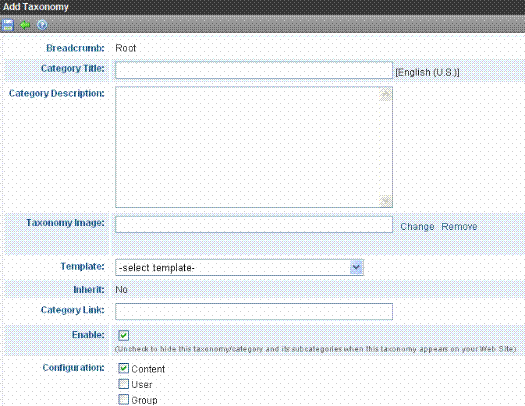
5. Use the following table to complete the screen.
Taxonomy Field Description
|
Field |
Description |
For more information, see |
|
Category Title |
Give the taxonomy a title. The title identifies the taxonomy wherever it appears. |
|
|
Category Description |
If desired, enter a more complete description of the taxonomy. It appears only on the Edit Taxonomy screen. |
|
|
Taxonomy Image |
If desired, you can assign an image to this taxonomy. For example, in the eCommerce feature, you could display this taxonomy image to indicate the type of products that make up the taxonomy. To display the taxonomy image, use Ektron CMS400.NET’s API. A sample of how to do this is provided in the following file, which is part of the developer sample site: site root/developer/taxonomy/taxonomy_image.aspx. |
|
|
Template |
If desired, select a template to apply to the taxonomy or category. |
|
|
Inherit (only appears when creating a category underneath a taxonomy) |
Check this box if you want this category to inherit its template from the parent category or taxonomy. If not, assign a template using the Template field (above). |
|
|
Category Link |
Use this field to direct a Web site visitor who clicks this taxonomy/category to any page on your Web site. For example, when someone is using your site’s company directory and clicks Human Resources > Benefits, he is directed to that area of your Web site. Without a Category Link, if a site visitor clicks a taxonomy category, the results appear on the same page. Enter a path to a destination page relative to your site root folder. For example, aboutus.aspx. When a site visitor clicks this taxonomy/category, he is directed to http://your URL/Site root folder/aboutus.aspx. You could also direct the user to a content ID, such as aboutus.aspx?id=62. |
|
|
Check this box if you want this taxonomy/category and its subcategories to appear when this taxonomy appears on your Web site. Use this field to block certain categories from appearing as part of this taxonomy. For example, you have not finished creating content for the category, so you don’t want it to appear yet. If you uncheck this box, this node and its child nodes are indicated by a gray background (see image below).
The gray background also appears when users work with this taxonomy/category on the Edit Content screen’s Category tab. This setting does not prevent you from assigning taxonomies/categories in the Ektron CMS400.NET Workarea. |
|
|
|
Select a configuration with which to associate the taxonomy. Content User Group Note:
|
||
| Let you extend the taxonomy's functionality by creating custom fields to capture additional information. |
6. Click Save ( ).
).
7. The View Taxonomies screen appears.
8. Next, add categories to this new taxonomy. To do this, click Add Category ( ) .
) .
Alternatively, you can hover the cursor over the Taxonomy in the right panel, right click the mouse, and click Add Category.
9. The Add Category screen appears.
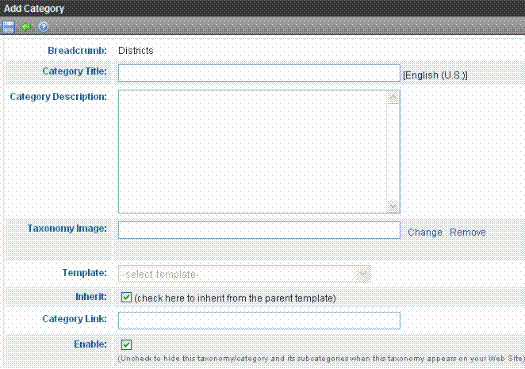
10. Enter the Category information. For information about these fields, see Taxonomy Field Description.
11. When finished, click Save ( ).
).
12. Repeat this process for each category you wish to add to this taxonomy.
.
Note: You can also assign a Taxonomy to content using the Edit Content in Folder screen’s Category tab.
Applying a Template to a Taxonomy or Category
Taxonomy categories are designed to help site visitors find content. To provide a taxonomy-based search, your developer places a Directory server control on a Web page.
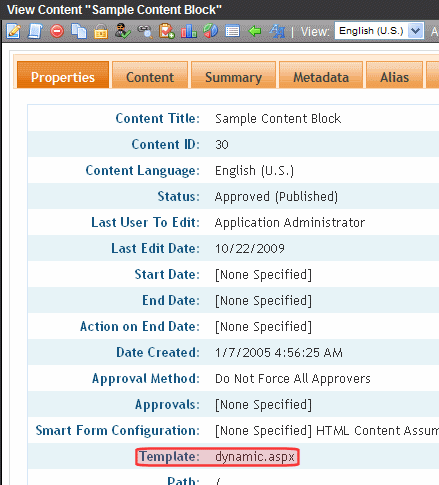
By default, when a user clicks a hyperlink on such a Web page, it uses the template assigned to the linked content (as illustrated below). See Also: Creating/Updating Templates
If you want to display the linked content using a different template, follow these steps.
1. When creating or editing a taxonomy or category, select the appropriate template at the Template pull-down field.
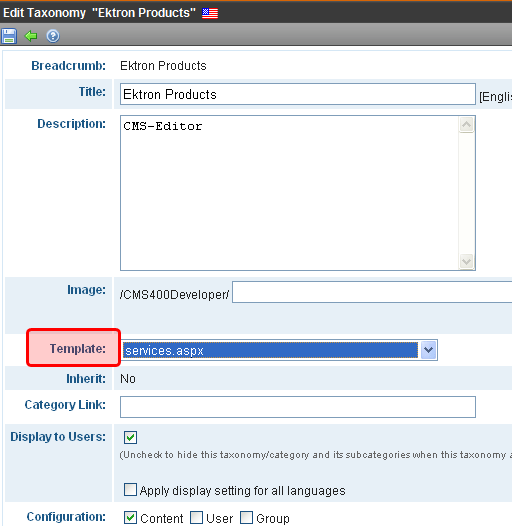
Note: Any category below the root level can inherit its parent’s taxonomy template. Use the Inherit checkbox to do this.
You may need a developer’s help with the rest of these steps.
2. In Visual Studio.Net, open the .aspx page that contains the directory server control.
3. Look at the server control’s MarkupLanguage property.
4. If the property is blank, open the following file: site root/workarea/template/taxonomy/taxonomy.ekml.
If the property displays an .ekml file, open that file. Its path may be listed in the property. If the .ekml file’s path is blank, it is workarea/template/taxonomy/.
5. Find the following line: [$HyperLink]<br/>[$Teaser]
6. Replace it with the following: <a href="[$TemplateQuickLink]">[$Title]</a><br/>[$Teaser]
7. Save the .ekml file.
The content selected from this Directory server control will now use the template assigned to the taxonomy/category.
Assigning a Taxonomy Configuration
There are three taxonomy configurations (that is, types). Each taxonomy is one of these types - content, user, or group.
|
Result |
|
|
Content |
Associate this taxonomy with content. When this configuration is selected you can assign content to the taxonomy/category the taxonomy category appears on every folder’s properties screen (shown below)
|
|
User |
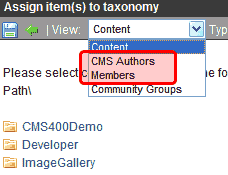
Associate this taxonomy with CMS or membership users. You select users for this taxonomy on the Assign Items to Taxonomy screen.
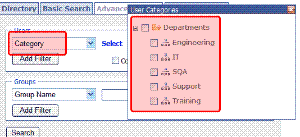
After users are assigned to a taxonomy, they can be found via the CommunitySearch server control’s Advanced tab. From the Advanced tab, select Category from the Users dropdown. Next Click Select and a User Categories selector appears (shown below).
|
|
Group |
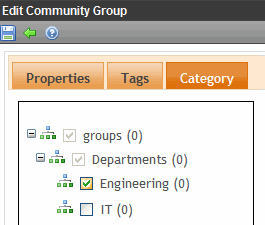
This taxonomy‘s categories can be assigned to community groups from the Category tab of the Edit Community Group screen. See example below.
If you do not check this box, users can only view taxonomy/category assignments on the Category tab. Whether or not this box is checked, you can assign taxonomy categories to community groups via the View All Categories of Taxonomy screen. |
Numbers on the View Categories Screen
When editing content, if you choose the Category tab, you see the Taxonomy that applies to this content. The number to the right of any taxonomy/category is a cumulative total of all items assigned to it and its subcategories. In the example below, the three subcategories have a total of 13 items (2 + 1 + 10).
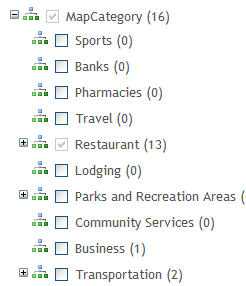
Since the number to the right of the parent category equals the number assigned to all subcategories, you know that no items are assigned to the parent category.
Also, the number includes individual items plus all items in any assigned folders. So, for example, if one content item and one folder are assigned to a category, and the folder has five items, the category’s number is six.
