Configuring a Plug-in Extension
Once you have created a Plug-in Extension, the Extensibility Configuration Editor allows you to:
prioritize plug-ins and events
enable or disable them
assign them to a specific site when using multiple sites with Ektron CMS400.NET
see a description of the plug-in or event
see who created a plug-in or event
By prioritizing the plug-ins and events you can set the order of execution for events of the same type that appear in multiple plug-ins. See Also: Setting the Plug-in Order of Execution by Event
Enabling and disabling plug-ins allows you to temporarily disable a plug-in or event without disabling the rest of the plug-ins and events. See Also: Enabling and Disabling Plug-ins and Events
If you are using the Multi-site support in Ektron CMS400.NET, you can assign a plug-in or event to a specific site. This allows you to build a Plug-in that might be used in multiple sites, but contain an event that you only want applied to a single site. See Also: Applying Plug-ins and Events to Specific Sites
The Extensibility Configuration Editor exists on your Ektron CMS400.NET server. For the editor to work with an Extension Plug-in, the plug-in needs to be in the watch folder C:\Program Files\Ektron\Plugins\Extensions located on the Ektron CMS400.NET server.
Opening the Extensibility Configuration Editor
To view Plug-in Extensions in the Extensibility Configuration Editor, click Start > Programs > CMS400 > Utilities > Plug-in Configuration on your Ektron CMS400.NET server. You can also access the editor using the ConfigurationUtility.exe file located in: C:\Program Files\Ektron\CMS400SDK.
Viewing Plug-in Extensions in the Extensibility Configuration Editor
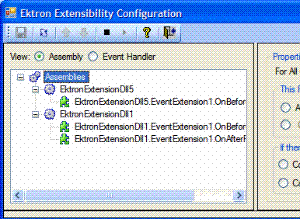
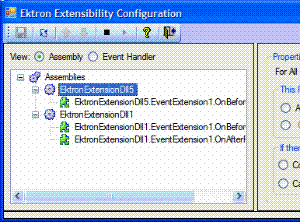
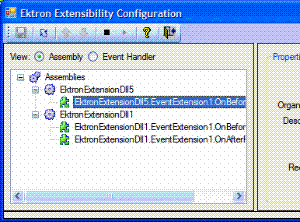
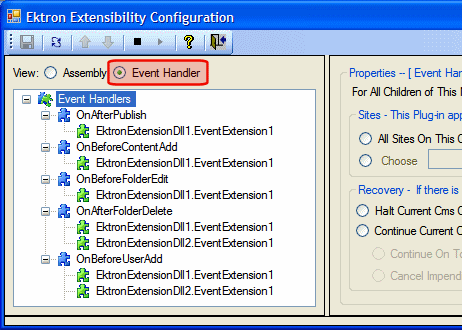
The Extension Plug-ins in the Extensibility Configuration Editor are displayed in a Tree format that enables you to show or hide each branch of the tree.
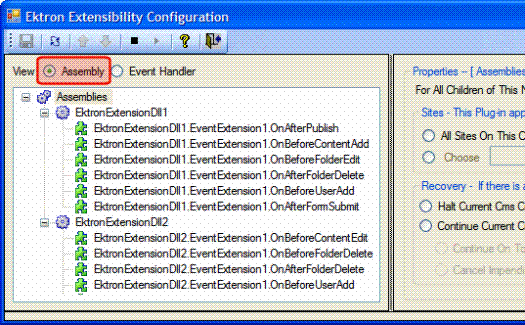
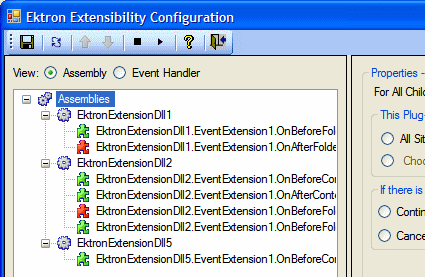
You can view the plug-in Extensions by Assembly or by Event Handler. When viewing by Assembly, you see each Plug-in Extension with all of the events for that extension nested below it.
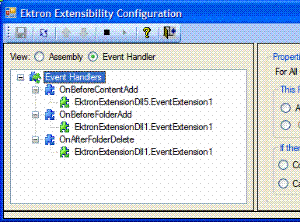
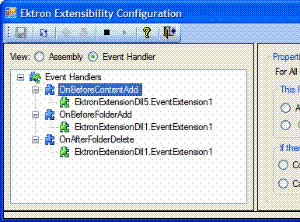
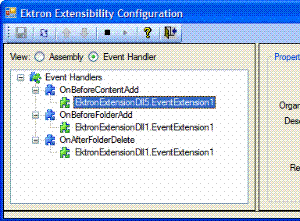
When viewing by Event Handler, you see each event with all of the Plug-in Extensions it belongs to nested below it.
The Extensibility Configuration Editor’s Toolbar
The plug-in toolbar allows you to Save settings, Refresh, Start and Stop, and Reorder plug-ins and events.
The table below shows each toolbar button and its description.
|
Command |
Button |
Description |
See Also |
|
Save |
|
Saves the changes made in the editor. |
|
|
Refresh |
|
Refreshes the editor and displays any new plug-ins that are added to the Extensions folder. |
|
|
Move Event Up |
|
Moves an event to a higher priority when multiple events of the same type are used. |
|
|
Move Event Down |
|
Moves an event to a lower priority when multiple events of the same type are used. |
|
|
Disable Selected Event |
|
Stops the event or plug-in from running. |
|
|
Enable Selected Event |
|
Starts the event or plug-in. |
|
|
Help |
|
Launches help information. |
|
|
Close Editor |
|
Exits the editor. |
|
Setting Plug-in Extension and Event Properties
When using the Assembly view, you can set properties at the Assemblies level, the Plug-in Extension level or at the event level. When using the Event Handler view, you can set properties at the Event Handler level, the Event level or the Plug-in Extension level. The table below explains the different levels.
|
Level |
Where the Level Appears in the Editor |
|
Assembly View |
|
|
Assemblies - All plug-ins and events below this level use the properties applied to this level. |
|
|
Plug-in Extension - The plug-in you choose and all the events associated with that plug-in use the same properties. |
|
|
Event - Properties are assigned to each individual event. |
|
|
Event Handler View |
|
|
Event Handler - All events and plug-ins below this level use the properties applied to this level. |
|
|
Event - The event you choose and all the plug-ins associated with that event use the same properties. |
|
|
Plug-in Extension - Properties are assigned to each plug-in. |
|
Extensibility Configuration Editor Property List
The following table lists the properties contained in the Extensibility Configuration Editor.
|
Property |
Description |
See Also |
|
Sites This Plug-in Applies to: |
Choose the sites to which this plug-in or event applies. You need only choose a site if you are using Multi-site support. |
Applying Plug-ins and Events to Specific Sites and |
|
Recovery If there is an unhandled error or false is returned from a plug-in, I would like to: |
Choose what happens when there is an unhandled error. |
|
|
Name |
The name of the plug-in or event is displayed. This property is set in the plug-in’s code. |
|
|
Author |
The author of the plug-in or event. This property is set in the plug-in’s code. |
|
|
Organization |
The organization or company that created the plug-in or event. This property is set in the Plug-in’s code. |
|
|
Status |
Decide whether plug-ins and events are enabled or disable. |
|
|
Order |
Decide the order of execution for events of the same type that appear in multiple plug-ins. For example, if the OnBeforeContentAdd event appears in EktronExtDLL5.EventExt1 and EktronExtDLL2.EventExt1, you can choose which plug-in’s event is executed first. |
Applying Plug-ins and Events to Specific Sites
If you are using the Multi-site Support feature in Ektron CMS400.NET, you may find it necessary to apply a plug-in or event to one site and not another. To accomplish this, use the Sites property. It allows you to assign events and plug-ins to all the sites on a server or to select sites on the server. For example, you are appending HTML content by applying a company’s copyright information to a site and you are supporting multiple sites with Ektron CMS400.NET.
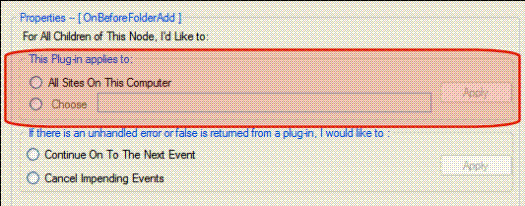
To apply a plug-in or event to a specific site, follow these steps.
1. Open the Ektron Extensibility Configuration Editor by clicking Start > Programs > CMS400 > Utilities > Plug-in Configuration.
2. Click the plug-in or event in the menu tree.
3. Under the Sites property, select either All Sites on This Computer or Choose radio buttons. The first time you select the Choose radio button, the Site Chooser screen appears.

Note: If the Site Chooser screen does not appear when you click the Choose radio button, click the Choose hyperlink next to the radio button.
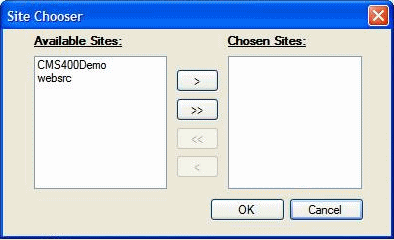
4. Highlight the sites in the Available Sites column to which the plug-in or event will be assigned.
5. Click the > button to move the selected sites to the Chosen Sites column. Click >> to move all of the sites. To remove a selection from the Chosen Sites column, highlight it and click the < button. To remove all selections, click the << button.
6. Click OK.
7. The chosen sites appear in the text box.

8. Click Apply.
9. Click the Save ( ) button.
Determining What Happens After an Error Occurs
The Recovery property allows you to decide how to handle errors that arise when utilizing plug-ins and events. For this property there are two choices:
Halt Current CMS Operation - in the event of an unhandled error, this selection stops the current operation completely. For example, if you publish a piece of content and the OnBeforePublish event has an unhandled error, the content is not published and the error message associated with the action is displayed.
Continue Current CMS Operation - when this option is selected, the choices below are available.
- Continue On to the Next Event - in the event of an unhandled error, the process moves to the next event. For example, if you had three plug-ins that contained the OnBeforePublish event and it failed in the first instance, the process would then move on to the next OnBeforePublish event.
- Cancel Impending Events - in the event of an unhandled error, the process cancels all impending occurrences of the event. For example, if you had three plug-ins that contained the OnBeforePublish event and it failed in the first instance, all subsequent OnBeforePublish events are canceled.
To apply the Recovery property to a Plug-in or Event, follow these steps.
1. Open the Ektron Extensibility Configuration Editor by clicking Start > Programs > CMS400 > Utilities > Plug-in Configuration.
2. Click the plug-in or event in the menu tree.
3. Under the Recovery property, select the Halt Current CMS Operation or Continue Current CMS Operation radio button.
4. If you select Continue Current CMS Operation, select Continue On to the Next Event or Cancel Impending Events radio button. Otherwise, continue to the next step.
5. Click Apply.
6. Click the Save ( ) button.
Setting the Information Properties in the Plug-in Code
You can add Author, Organization and Description information to your plug-in code. This helps you identify who wrote the plug-in and what it does. This information can be assigned at the assembly level (the plug-in) or the method level (the event). The method level attributes override the attributes assigned at the assembly level.
You assign assembly level attributes in the AssemblyInfo.cs or AssemblyInfo.vb depending on the language you are using. Method level attributes are assigned in the plug-in code above the method. The example below is at the method level using C#:
[ExtensionAuthor("John Smith")]
[ExtensionDescription("Appends text to the html")]
public override bool OnBeforePublish()
The following table shows more syntax examples for C# and VB.
|
Example Type |
Language |
Example |
|
Method Level |
C# |
[ExtensionAuthor("John Smith")] [ExtensionDescription("Appends text to the html")] public override bool OnBeforePublish() |
|
Assembly Level |
C# |
[assembly: AssemblyDescription("Assembly Level Description")] [assembly: Ektron.Cms.Extensibility.ExtensionAuthor("John Smith")] [assembly: AssemblyCompany("Ektron Company Extension")] |
|
Method Level |
VB |
<ExtensionAuthor(“John Smith”)> _ <ExtensionDescription(“Before Content Add Description”)> _ Public Overrides Function OnBeforeContentAdd() As Boolean Note: The continue character “_” must be used at the end of each description line. |
|
Assembly Level |
VB |
<Assembly: AssemblyDescription(“Assembly Level Description”)> <Assembly: Ektron.Cms.Extensibility.ExtensionAuthor(“John Smith”)> <Assembly: AssemblyCompany(“Ektron Company Extension”)> |
Enabling and Disabling Plug-ins and Events
Plug-ins and events are enabled and disable using the Enable Events ( ) and Disable Events (
 ) buttons. You can enable or disable single events by clicking on the event and then clicking the Enable or Disable button.
If you want to enable or disable all the events in a plug-in, click on the plug-in while in the Assemblies view. Next, click the Enable or Disable button. To enable or disable all of the events of the same type, click on the event while in the Event Handler view. Next, click the Enable or Disable button.
When events are enabled, their puzzle icon is green. If they are disabled, their puzzle icon is red. Plug-ins and events are enabled by default.
Setting the Plug-in Order of Execution by Event
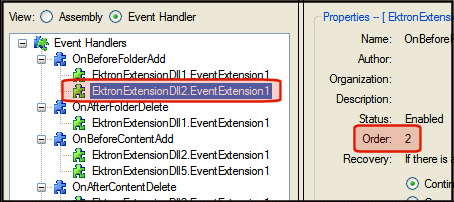
Setting the plug-in execution order allows you to control when events of the same type are executed. For example, if you have three OnBeforePublish events in three separate plug-ins, you can decide which OnBeforePublish event happens first, second and third.
The order of events can only be set in Event Handler view. This way you see the plug-ins sorted by event. To change the plug-in execution order, click a plug-in and use the Event Up ( ) or Event Down (
 ) button to reorder plug-ins.
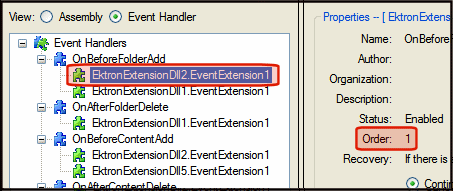
In the before and after example below, the EktronExtensionDll2.EventExtension1 has been move to order position 1 (one) for the OnBeforeFolderAdd event.
Before:
After:
